Six Simple Steps To Setting Up A Website With HEXONET
With a little bit of help from HEXONET's new Weebly website builder, you can now quickly launch a website for any of your domains at HEXONET. We know the importance of getting domains and your ideas online, so we've made it easy to bring your idea to life in just a few steps. The easy-to-use drag and drop options are simple for all skill levels, no coding experience required.
And remember, for any domain you have with HEXONET you can activate a free website today. Read below for a step-by-step guide on getting started - we can't wait to see what you create!
1. Sign Up With HEXONET
In order to get started, you will need a HEXONET account. If you already have one, great, click here to login to the Control Panel. If not, head over to our sign up page and you'll be ready to start building in no time.
2. Start For FREE!
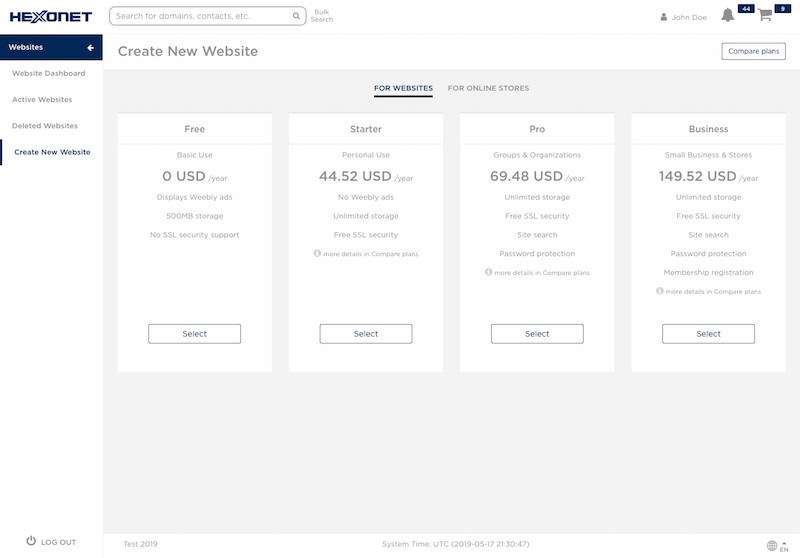
A free website is available to all HEXONET customers. You'll have the option to upgrade to a premium plan at any time.
Once logged in to the Control Panel, click on the WEBSITES button in the left sidebar, then select CREATE NEW WEBSITE. From here, you can choose the free plan, or opt for a premium plan if you have your sights set on more options.
You will be prompted to enter your domain name and e-mail address. Once entered, select CREATE, and if the website has been successfully created, you will see a button labeled START EDITING. Clicking on this button will open a new tab that will take you directly to the Weebly Editor - you're ready to start creating!
3. Select A Theme
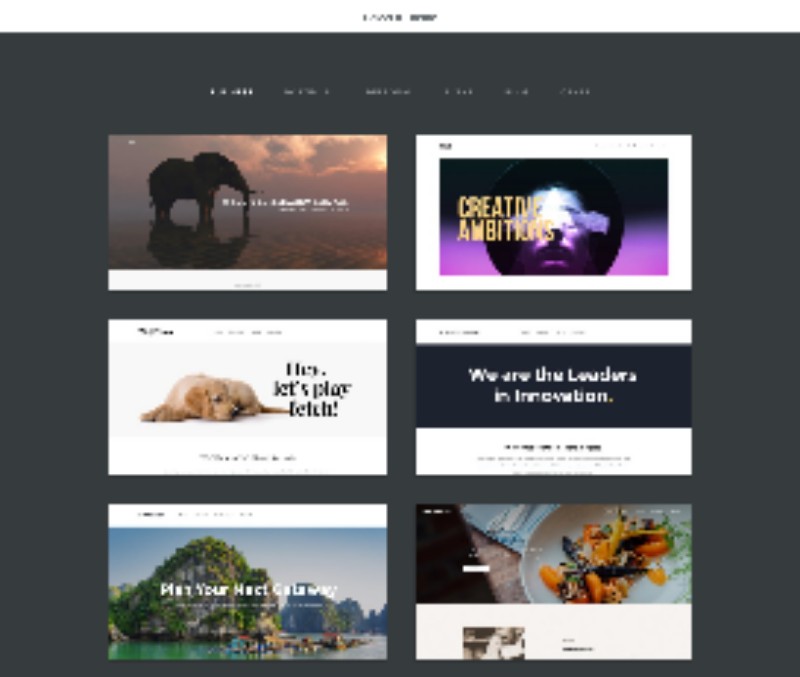
Weebly lets you get as creative as you can imagine. With plenty of themes to suit different industries, including business, e-commerce, portfolios, personal, event, and blog, there is sure to be the right site for your dreams. To make things even easier, each pre-designed theme is made to serve a specific industry's needs, saving you time and effort in the creative process.
TIP: When choosing a theme, ask yourself what you are trying to accomplish with your website. If your goal is to get leads, then using an action button and a theme with a clear call-to-action (CTA) may be a good choice for your brand. However, if your goal is to share your artwork, then you may choose to go with a theme that utilizes a series of images. If you can't find a theme that fits your vision perfectly, don't worry! You can always customize your website using Weebly's drag and drop editor to create your unique vision.
4. Design Your Website
Now that you have chosen a theme, let's get designing!
A. Adding & Editing Pages
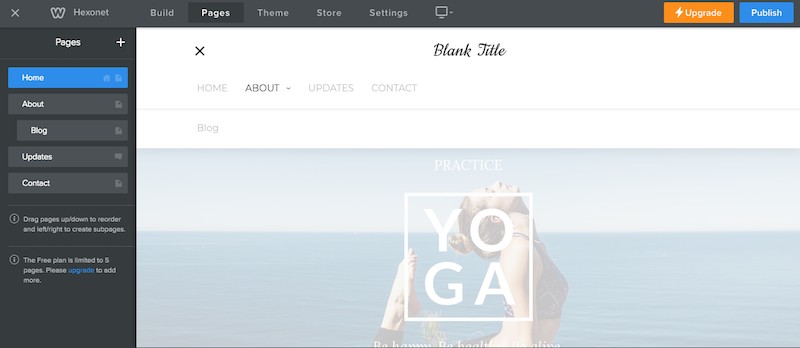
To manage your website's pages, click the PAGES tab at the top of your Weebly Editor screen. This will populate a list of all your pages on a left sidebar within your website.
A few items to note:
- To add a page, click on the + icon on the top right of the sidebar.
- To edit or delete a page, click on the folder icon next to the page title.
- The page at the top of the list will be your default homepage. This will be marked by a home icon next to the title page.
- You can drag and drop a page to the right to create a subpage. Subpages will only appear on the website's navigation bar when the parent main page is hovered over with the mouse.
B. Changing Or Editing Text
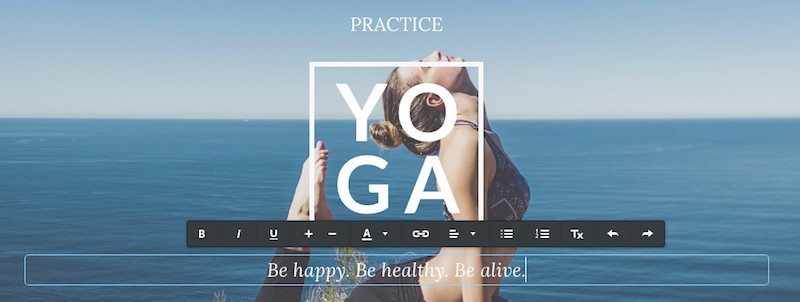
Your copywriting skills can be highlighted at the click of a button. To change or edit text, simply click on the text box and type. Not only is this easy for the original website creation, but makes it easy to keep your content fresh and easy to test.
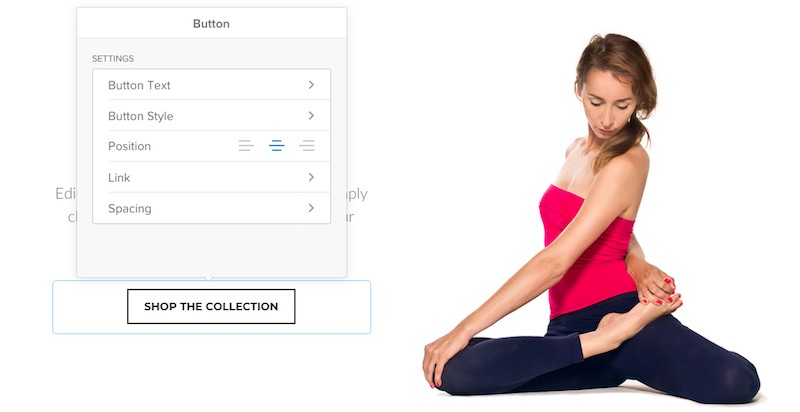
To edit the text on a button, click the button and a pop up bar will appear. Click on BUTTON TEXT and type your desired copy. You can also stylize your button through the same pop up, by changing the style, adjusting text position, spacing, and more.
C. Adding Or Changing An Image
Change your website's background image to one that matches your brand by clicking on the image. This will open a toolbar through which you'll see the option to replace or edit the current image. You can choose to upload your own photo, or select one from the Weebly theme gallery.
TIP: Weebly gives you the option to edit your image directly in the app. Crop, add filters, adjust brightness, add text, and more!

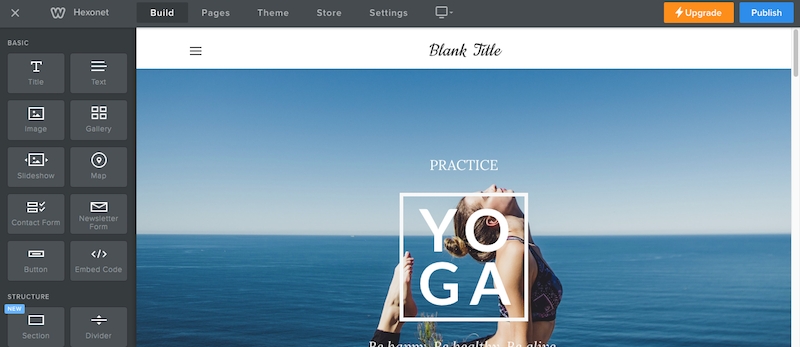
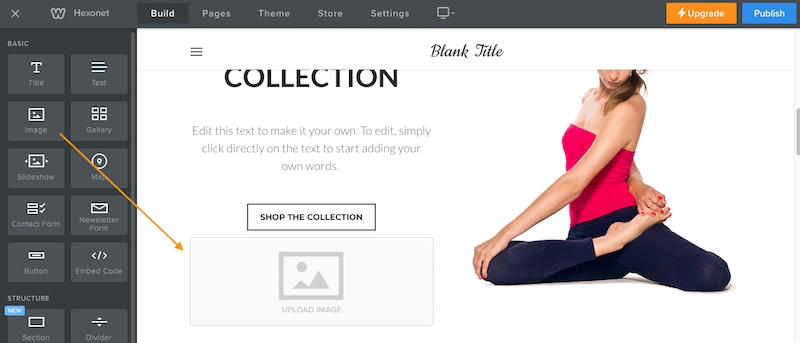
To add additional images to your website, click on the BUILD tab at the top of your Weebly Editor screen and drag the IMAGE element from the left sidebar to your desired location. The image element allows you to upload your own images onto your website, with editing options available.
D. Adding Elements
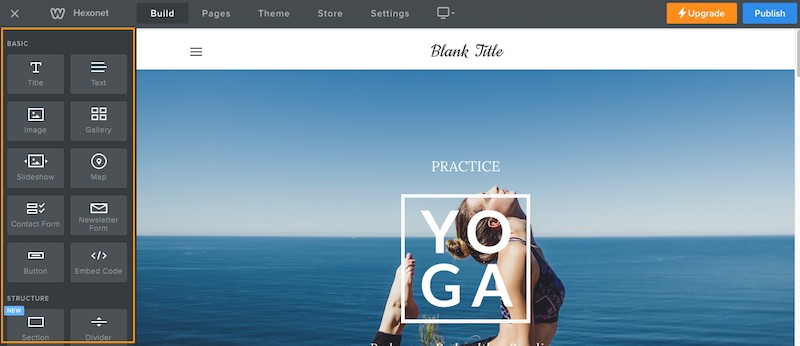
Elements are components you can add to your website to customize your theme and make it your own, some examples are: slideshows, maps, and contact forms. In order to add an element to a page, click on the BUILD tab at the top of your Weebly Editor screen and drag your desired element onto the page. Add one, or multiple, to create a completely unique experience.
5. Publish Your Website
Congratulations, now that you're done designing, it's time to publish your website! You can do this by clicking the PUBLISH button on the top right corner of your Weebly Editor screen.
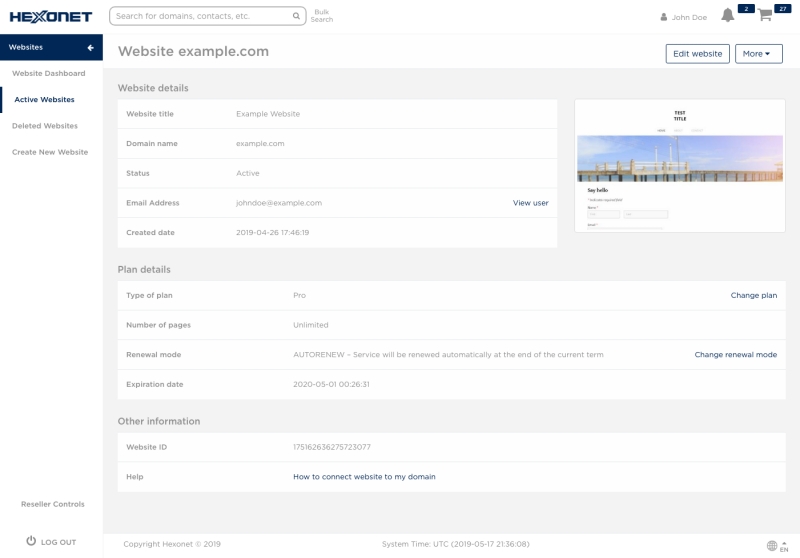
NOTE: You can make additional changes to your website at any time by logging into your HEXONET Control Panel. Once logged in, go to WEBSITE → ACTIVE WEBSITES and click on the MANAGE button. Here, you can select EDIT WEBSITE, which will open a new window directly to your Weebly Editor screen.
6. Next Steps
While the free plan is a great starting point, if you're a business owner, professional or a large organization, you may want to explore Weebly's paid options. The paid plans offer further access to features and elements, unlimited storage and advanced e-commerce tools to take your website to the next level.
Log in to your Control Panel to see a comparison of all the plans, and find one that works best for your needs.
